Nothing transforms a weathered wooden deck quite like a thorough pressure wash. I know how tempting it is to blast away grime and reveal that fresh wood underneath but there’s a right way and a wrong way to do it. One wrong move and you could end up with splintered boards or costly repairs.
I’ve seen too many homeowners make simple mistakes that turn a weekend project into a headache. That’s why I’m sharing the essential do’s and don’ts of pressure washing wooden decks. With the right approach you’ll protect your investment and keep your deck looking its best for years to come. Let’s make sure you get the clean results you want—without the damage you don’t.
Understanding Pressure Washing for Wooden Decks
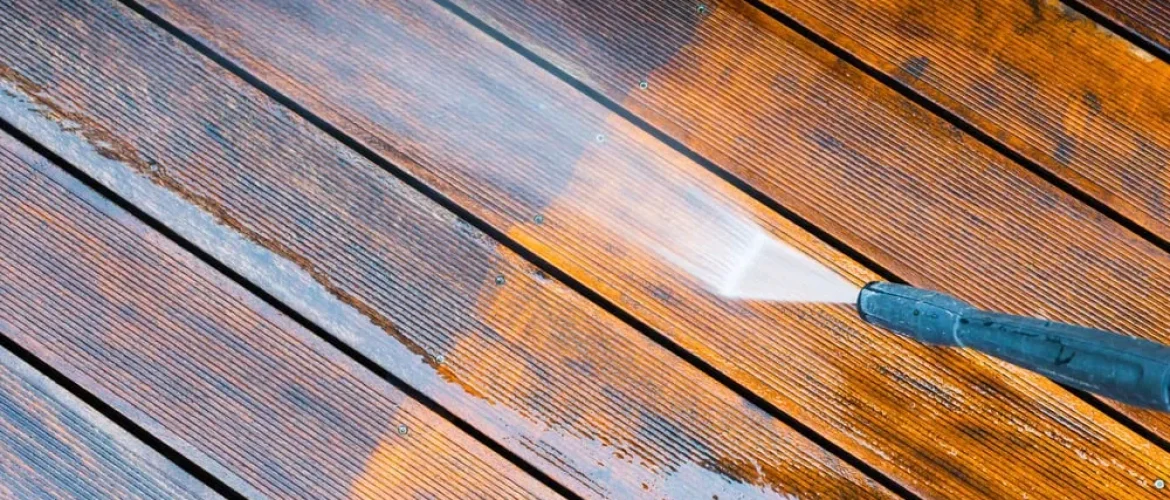
Pressure washing wooden decks keeps surfaces clean, but using too much force often leads to splintering, gouges, and fading. I use the right settings on my equipment to remove dirt, mildew, and old stains while protecting the wood’s texture and structure. Most wooden decks—like those built from cedar, pine, or redwood—respond well to lower pressure levels, around 500 to 1,200 PSI.
Spray patterns make a difference. I choose a fan tip or a 25-degree nozzle to spread water evenly and avoid etching the boards. Holding the wand at the right angle, about 12 to 18 inches from the surface, lowers the risk of striping or permanent marks. I use steady, overlapping strokes for an even clean.
Decks with existing stains or sealer sometimes need a gentler approach. I always test my washing technique on a small, hidden area before treating the entire deck. This helps me spot signs of wood fuzzing, color loss, or raised grain. Careful handling preserves the deck’s appearance and gives the best results.
Preparing Your Deck for Pressure Washing
Getting the deck ready boosts cleaning results and helps avoid unnecessary wear. With the right approach, I make sure the wood stays in great shape throughout the process.
Inspecting the Deck for Damage
I start by looking for loose boards, popped nails, splinters, and cracked wood. Spotting soft spots or visible mold tells me some areas might need extra care or even repairs before I begin. If I see peeling paint or a worn finish, those spots call for gentle cleaning. Clearing all debris, leaves, and furniture keeps the surface open for a thorough check and prevents clogging the pressure washer.
Choosing the Right Equipment and Settings
When I select equipment, I pick a pressure washer rated between 500 and 1,200 PSI. Fan tips and 25-degree nozzles make it easier to sweep the wood without cutting into it. I avoid narrow stream attachments since they cause visible lines or even gouges. Setting the wand at a safe distance—often 12 to 18 inches—prevents harsh marks on the boards. Testing everything on a hidden corner shows how the deck responds before I work on main surfaces.
The Do’s of Pressure Washing Wooden Decks
Pressure washing a wooden deck calls for careful attention to avoid damaging the wood. A few key practices help keep the deck clean and looking its best.
Using Proper Techniques
Holding the spray nozzle about 12 to 18 inches from the deck surface works best for even cleaning. Moving the wand in long, steady strokes keeps the water pressure balanced. Overlapping each pass by several inches helps avoid missed spots and striping. During the cleaning, using a fan tip or a 25-degree nozzle distributes pressure more gently across the wood, reducing the risk of splintering.
Protecting the Surroundings
Covering nearby plants, electrical outlets, and siding shields them from overspray and runoff. Removing furniture and outdoor items clears the space and helps spot trouble areas. Checking that water flows away from the house keeps walls and foundations dry throughout the process.
Post-Wash Care and Maintenance
Letting the deck dry completely after pressure washing is important before applying sealant or stain. Checking for raised wood fibers or splinters after washing lets me sand rough spots so the surface stays safe for bare feet. Regularly clearing debris and leaves after cleaning helps preserve the look and life of the wood.
The Don’ts of Pressure Washing Wooden Decks
Pressure washing a wooden deck can do more harm than good if I don’t use the right approach. Paying attention to common mistakes keeps my deck safe from permanent damage.
Avoiding Common Mistakes
Blasting the deck with high pressure strips away wood fibers and causes splintering. Pressing the wand too close leaves unsightly lines and gouges. Ignoring manufacturer recommendations for nozzle type leads to uneven cleaning and finishes. Using strong chemical cleaners without checking compatibility stains or discolors the wood. Skipping the step of clearing furniture and debris creates missed spots and rough patches.
Recognizing Signs of Overwashing
Surface fuzz or raised wood fibers means I’ve used too much force. Pale, faded areas or unexpected white streaks show wood’s protective layer has worn away. Deep grooves and soft spots indicate repeated passes in one place. If water soaks in instantly instead of beading up, the wood’s natural defenses no longer work. Spotting these signs early helps me adjust my technique and protect the deck’s finish.
Tips for Maintaining a Clean and Healthy Deck
Regular sweeping keeps leaves, dirt, and debris from building up between the wooden boards. After a storm or heavy wind, I use a sturdy broom to help prevent moisture from getting trapped, which can lead to mold or mildew.
Light rinsing every few weeks helps wash away pollen and dust. I grab the garden hose for this task, making sure water moves across and off the deck rather than pooling in corners.
Stubborn stains sometimes appear from plant pots and food spills. I spot-clean these right away with a soft brush and a mild cleaner safe for wood decks. Prompt attention helps prevent long-term discoloration.
Annual inspections help catch early signs of wear or damage. I check for loose boards, popped nails, and any areas where the finish is fading or peeling. Addressing small issues quickly preserves the structure and wood quality.
Reapplying a sealant or wood preservative every one to three years keeps the wood resistant to moisture and sunlight. I wait for dry, mild weather and make sure the deck is completely clean and dry before sealing.
Relocating heavy furniture now and then reduces the chances of uneven fading or pressure marks. Using furniture pads also guards against scratches and denting.
Trimming nearby bushes and trees improves airflow around the deck, letting boards dry out completely after rain. Extra sunlight and movement help discourage moss and mildew.
Preventing standing water extends a deck’s lifespan. I gently slope pots and accessories to drain, keeping everything dry and fresh between washes.
By adding these simple steps into my regular routine, I keep my wooden deck looking great and safe for anyone who visits.
Conclusion
Pressure washing a wooden deck doesn’t have to be intimidating or risky when you know what to watch out for and how to approach the job. I always remind myself that a little patience and the right technique can make all the difference in both the look and lifespan of my deck.
By staying mindful of best practices and avoiding common pitfalls I’m able to keep my deck in top shape for years to come. With regular care and smart cleaning habits I can enjoy a beautiful outdoor space that’s ready for relaxing or entertaining whenever I need it.


